Popular Pages
Setup PPTP/L2TP VPN server on Mac OSX client OS using VPN Activator
What is VPN Activator
This free application is a GUI for the hidden VPN server in Mac OSX client OS developed by the people at Netputting.com. The application will configure and start/stop the L2TP & PPTP VPN server hiding in your Mac. All files necessary to do this are already part of the OS... so no Apple files are needed nor distributed by this application. This application is not intended for large scale enterprise use. It is rather intended for common folks that wish to establish a VPN connection to their home network via their personal Mac.
At the moment you can only create a single user/password/secret combination. This user/password is not one of the existing user defined on your Mac but rather a dedicated user/password dedicated for the VPN use.
Given that you properly configure you internet router to allow L2TP and/or PPTP across to your Mac you should be able to connect to your home network via your Mac running "VPN Activator".
If you expect to see your Bonjour shared resources to magically appear on the VPN connected device you will be disappointed. Apple's implementation of Bonjour does not work across a VPN. There are some ways of working around the limitation but none that can cleanly be packaged. So for now you will have to manually map network and printers shared on your home network.
This is not a limitation of VPN Activator but rather an Apple's implementation limitation of the Bonjour protocol.
Download:
Download the latest version: VPN Activator v0.4.6
System Requirements:
- OSX Snow Leopard 10.6.8+
HOW TO activate the VPN feature:
Here is a short step by step on how to get the application to work if you have a Mac running Snow Leopard and an Airport Extreme internet access gateway.
1. Run "VPN Activator"

2. Configure the desired IP address range that you want to assign to your VPN clients. In the example above, since I use the 10.0.1.0/24 subnet in my home, I am assigning a range of 2 IP address as 10.0.1.122 & 10.0.1.123
3. C0nfigure the desired DNS servers. I personally use Google DNS at 8.8.8.8 and 8.8.4.4
4. Configure the desired User name and Password
5. Configure the desired VPN Shared Secret. Pick something hard to guess.
6. Click on the ON switch to save the config and start the VPN server. If all goes well the server should start. For now my status check routine if really dumb and does not actually check if the server is running so don't rely too much on it yet. Once the server is started the configuration fields go inactive until the server is stopped and changes can be made.
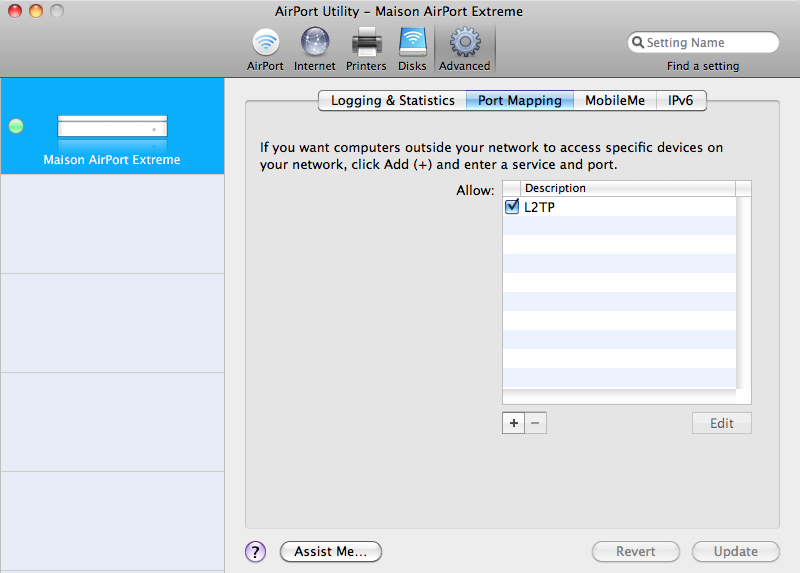
7. To be able to connect with L2TP VPN you will need to configure your Airport Extreme to forward ports UDP500, 1701 & 4500 to your Mac. Open Airport Utility, Click Advanced and select Port Mapping:

Click the "+" sign and fill in the blanks as shown below. Make sure to put the IP address of your Mac (and not mine) in the Private IP Address field:

Click Continue and fill in the next screen as:

Click Done.
8. To be able to connect with PPTP VPN you will need to configure your Airport Extreme to forward ports TCP 2173 to your Mac. Open Airport Utility, Click Advanced and select Port Mapping:
Click the "+" sign and fill in the blanks as shown below. Make sure to put the IP address of your Mac (and not mine) in the Private IP Address field:

Click Continue and fill in the next screen as:

Click Done.
9. Configure your iPad or iPhone to use your Mac as a VPN. I will eventually write a full guide for this, but for now take note that your will need to find out what is your external IP address on the internet, you can use this page to help you find it out.
10. Configure the VPN and activate. You should now be connected to your home network.